What are Web Components?
Just like HTML elements like divs, spans, tables etc. Web components are custom HTML elements that can be used and reused in web apps and web pages.
Component-based architecture is the main architecture for front end development today. Developers can build custom elements that can be embedded into web pages. The elements can be reused and nested anywhere, allowing for code reuse in any pages or apps.
Here’s an example, this is a custom element called video-player which provides a reusable video interface that has UI features beyond what’s available with the standard HTML 5 video element. This element provides an attribute “src” for the video file and events like “play”, “pause” etc, to allow a consumer to programmatically control it.

This looks a lot like what regular Vue components can do! The difference is that web components are native to the browser and can be used like normal HTML elements. Regardless of what tools you use to create your web component, you can consume it in React, Angular etc, or even with no framework at all exciting! Lets now jump into creating one on our own.
Lets create a web component
Now in order to create a web component using Vue Cli 3, you need to install vue-cli-service-global package if you have already, you can skip installation
npm install -g @vue/cli-service-global
If in case you don’t have vue cli installed on your machine use following command instead
npm install -g @vue/cli @vue/cli-service-global
Now we are going to create a component called userstatus.vue, feel free to copy following code
<template>
  <div>
    <div class="online-status">
      <div v-if="isOnline" class="online">
        <span class="light"></span>
        <p>{{userName}} is online</p>
      </div>
      <div v-else class="offline">
        <span class="light"></span>
        <p>{{userName}} is offline</p>
      </div>
    </div>
  </div>
</template>

<script>
export default {
  name: "userstatus",
  data() {
    return {
      isOnline: false,
      userName: "Devkant"
    }
  },
}
</script>

<style lang="css" scoped>
.online-status {
  background: #dbdbdb;
  border: 1px dashed #ddd;
  display: inline-block;
  padding: 10px;
}
p {
  display: inline-block;
  font-family: Arial, Helvetica, sans-serif;
  margin: 0;
  color: #555;
}
.light {
  display: inline-block;
  width: 10px;
  height: 10px;
  border-radius: 50%;
  margin-right: 10px;
}
.online .light {
  background: limegreen;
}
.offline .light {
  background: crimson;
}
</style>
vue serve userstatus.vue
you gonna see something like following into your browser once vue serve userstatus.vue commands does its job & put our app / component on http://localhost:8080/

Now that the app / component is up & running lets create a Web Component out of it, and use it inside a .html file
First off we need to make some changes to the code itself don’t worry these will be minor ones, as you might have seen that the data() has got two items i.e., isOnline & userName, now in order to make this component accept input from outside / or rather from its parent we need to make some changes
data() {
    return {
      isOnline: false,
      userName: "Devkant"
    }
  }
Just remove data() from your code and add following code
props: ['online', 'name'],
  computed: {
    isOnline() {
      return this.online === 'online'
    },
    userName() {
      return this.name ? this.name : 'user'
    }
  },
now your code should look like following

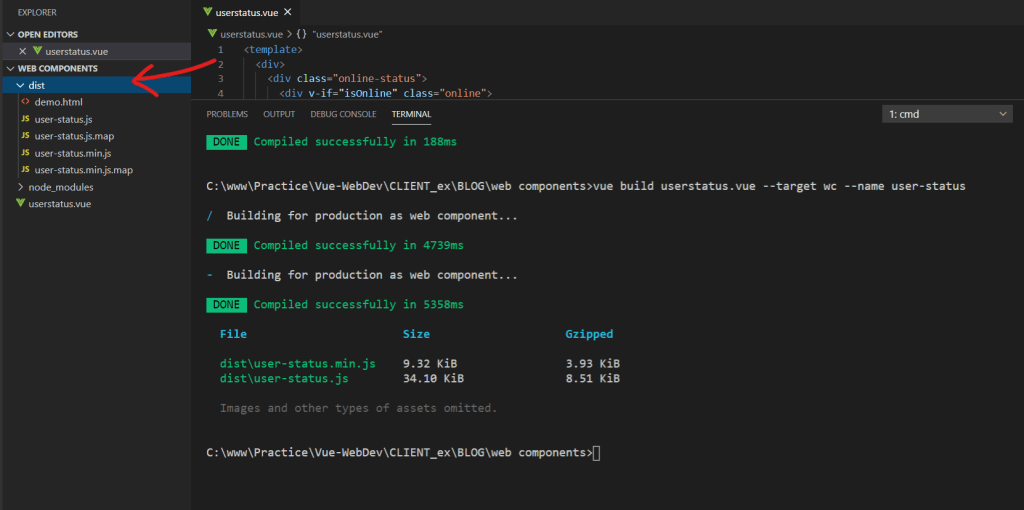
Lets run following command into your terminal inside your project directory
vue build userstatus.vue --target wc --name user-status

this will create a dist folder inside same directory which will have your Web Component ready, which you can see in the following image
Okay so we have successfully created our Web Component, next step is to use this Web Component
Lets use our Web Component
If you open and see dist folder you gonna see a demo.html file, open this file it shows how to use this very Web Component

Lets create a new file called index.html & use this web component inside that

Viola! your Web Component has been successfully deployed in a plain HTML file, this way you can use this web component inside a react or angular app as well,
Also you can pass your props like following


